This is the third part in a multi-part series on branching conversation systems (crossposted at Gamasutra.com). See the Introduction for context.
I’ll promise you one thing: It won’t get less exciting than this. The good news is, we’re keeping it short.
This is the part in our series where we discuss not art, but craft–and only craft. I’m not going to give advice on writing sparkling dialogue or how to grab the Player’s attention. Today, we’re going to talk about how to build the sprawling nightmare that is a branching conversation while making it easy to understand, easy to edit, and easy to script.
I can’t emphasize enough how important this is–a brilliant conversation that looks like a tangled knot will drag your project down when your variables turn out to be buggy or a story element must change. Spending hours trying to untangle your own work (or expecting colleagues to do so) isn’t an efficient use of time, especially when it’s not necessary.
Editing Tools
As we discussed in part one, building a branching conversation requires a specialized toolset. Don’t even think about hardcoding conversations or writing them in, say, Excel and having your game parse the spreadsheets. It can be done, of course, but it’s the equivalent of trying to paint a landscape using a paperclip.
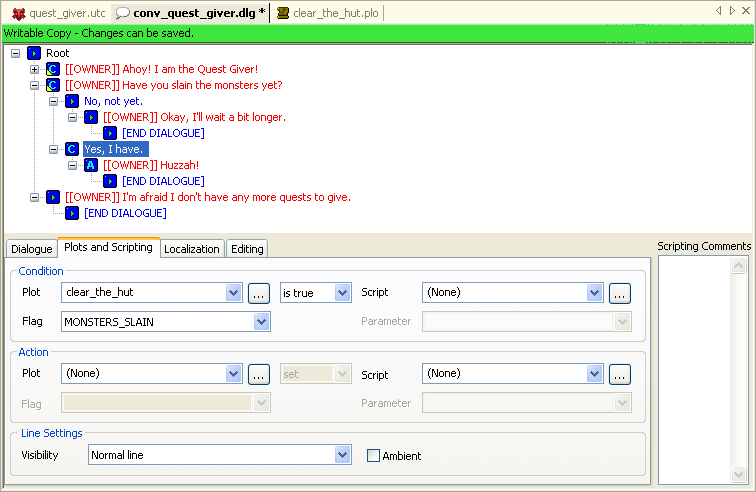
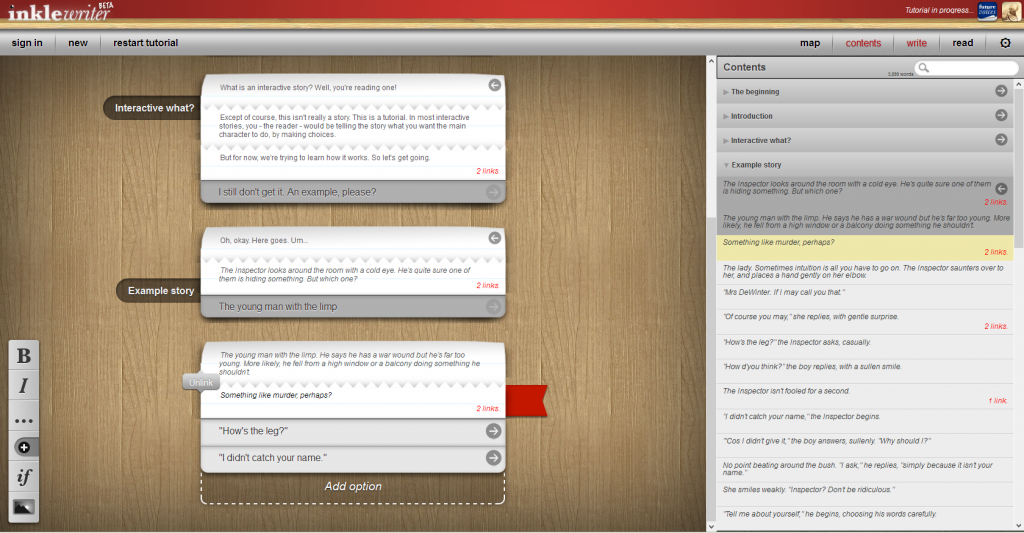
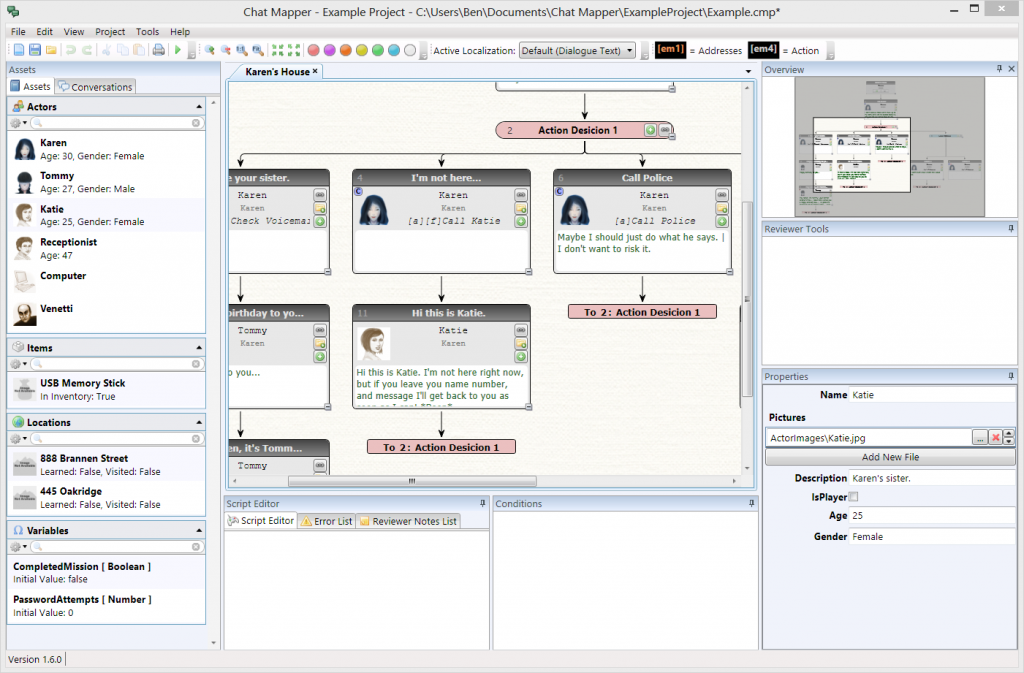
Screens from the Dragon Age: Origins toolset wiki, the inklewriter tutorial, and Chat Mapper promotional media.
For experimental and educational purposes, the toolsets included in Dragon Age: Origins, Neverwinter Nights, and Neverwinter Nights 2 are top-of-the-line and readily available; due to their licenses, of course, they are not appropriate for commercial projects. I’m informed that Shadowrun Returns includes a very similar conversation editor, and you’ll notice vast similarities between these tools. Inkle Studios’ inklewriter software is available for commercial license and was used for Stoic’s The Banner Saga, although it’s primarily intended for more prose-heavy, Choose-Your-Own Adventure-style games. Urban Brain Studios produces Chat Mapper, another toolset available for commercial license (though I have no personal experience with it and can’t speak to its particular strengths; it was brought to my attention by a blog commenter).
No doubt there are other available and commercially licenseable toolsets in the world (and of course, programming a toolset from scratch is always an option). If you’re aware of good ones, please mention them in the comments. My own examples are drawn from a proprietary editor created by Rick Burton of Knight Mayor.
No matter what software you’re using, a branching conversation editor must do the following:
Branch. Not a controversial or surprising requirement, I’m sure. The editor needs to let the user create NPC lines and Player options. Different Player options must be able to lead to different NPC lines. Ideally, the editor also lets the user set variables and branch based on those variables, presenting different NPC lines or Player responses depending on the variables set (or not) on the Player character.
Link. The editor must allow lines to be “linked” (as a symbolic link in a UNIX file system or a Windows shortcut). This lets the user reuse the same line or branch in multiple places without writing it multiple times. Proper linking (as we’ll discuss below) is vital to creating clean and editable conversations.
Visual Representation and Navigation. An editor needs to let the user view the structure of the conversation as a whole. Branching dialogue is difficult enough when viewed one line at a time; seeing the flow of a conversation, where it branches, how long those branches are, where they merge, and so on is necessary to good craft.
Different tools may provide visual representation in different ways–my examples below are in the general style of the Neverwinter Nights editor, while inklewriter uses a different style of display and requires switching to a different mode to view the conversation “map”–and individual writers may have their own interface preferences. Nonetheless, it shouldn’t be difficult to translate one tool’s style to another–the fundamentals remain the same.
The Critical Path
With those functions of the tool in mind, how do you apply them?
The backbone of any branching conversation is its critical path. As we discussed last time, the critical path is the portion of the conversation tree that every Player sees; it cannot be missed or escaped for gameplay to continue. For that reason, it should deliver any vital information and story points the Player needs for a rich and fulfilling experience
It’s possible for a conversation’s critical path to branch into multiple mutually exclusive paths, as in the case of a major split in the narrative. It’s also possible for a conversation to have a nearly nonexistent critical path–an optional question hub might have a critical path consisting only of a greeting and a goodbye line, with everything else easily skipped by the Player.
It’s generally a good idea to know the contents of your critical path–at least in broad strokes–before you begin building a conversation. You can save yourself a lot of trouble by treating your critical path as a core, semi-linear part of your conversation that all other branches eventually must return to. Approaching a conversation the opposite way–writing “organically” and only afterward attempting to ensure that every possible combination of Player choices provides all necessary information–will make life far more difficult.
Basic Structure
So you’ve got your conversation editor and you know what you want to write. (We’ll discuss outlining and figuring out how to structure a scene in a narrative sense in a later post–right now, we’re only concerned with creating a perfectly formatted, albeit awful, branching conversation.) So what should a branching conversation look like?
Pretty much like this:
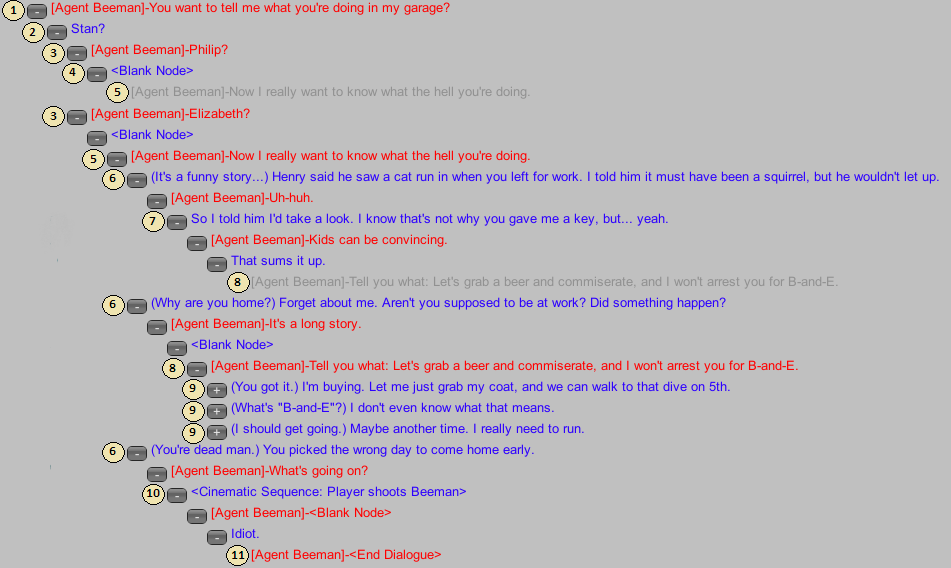 A conversation in waterfall structure (click to enlarge).
That’s a conversation using waterfall structure. A hub-and-spoke conversation would look very similar, but would “loop” somewhere, like so:
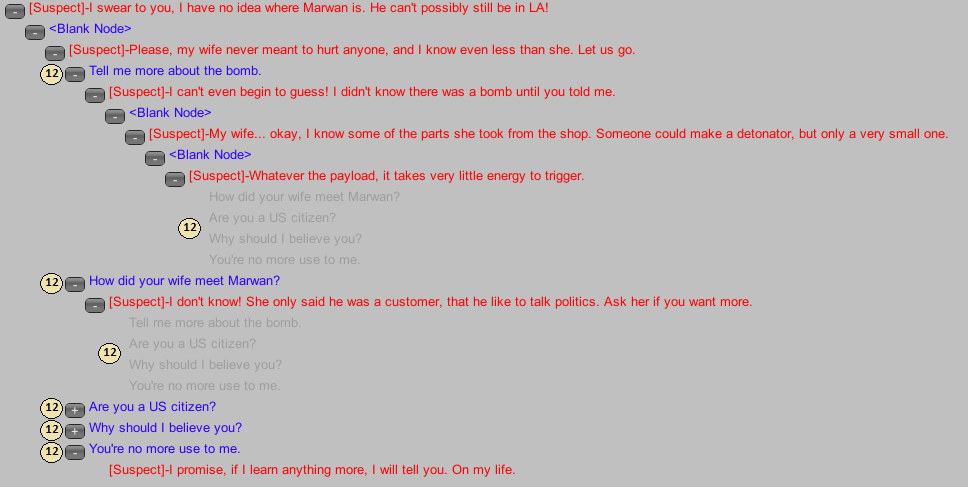 A conversation in hub-and-spoke structure (click to enlarge).
Let’s go through these and break them down.
1: Red Lines and Blue Lines. In this editor, red lines are NPC lines (and show the NPC’s name in brackets before the text) and blue lines are Player lines.
2: Forced Player Line. Note that the Player doesn’t have any options here; to make the scene flow better, we’re forcing him or her to call the NPC by name. (If this conversation has voiceover, presumably this line plays automatically rather than appearing as the sole available response option.)
3: Dualing NPC Responses. Note the two different NPC responses here, both coming off the Player’s “Stan?” line. This is a branch, but it’s not a branch based on a Player response option.
So what is this branch for? For this sample, we’re pretending that the Player character can be either “Philip” or “Elizabeth” (presumably a selection made at character creation). These lines would be scripted to check for a variable–“is the Player Philip?” If the answer is yes, play the first line; if not, fall through to the next NPC line (which assumes the Player character is Elizabeth).
Even for a very simple variable check, it’s important to get the logic right! A branching dialogue writer doesn’t need programming skills, but some basic logic skills can’t hurt.
4: Blank Nodes. Labeled for convenience. This editor requires that a Player line come after every NPC line and vice-versa; therefore, to have two NPC lines in a row, the Player line between them must be blank.
Blank nodes can be useful for scripting or commenting purposes in some toolsets and engines. In others, they may be useless or nonexistent.
5: Linking Down. The gray line indicates a link to another text branch. In theory, we could put the “real” branch at the top and put the link off the “Elizabeth” line–the conversation would function just as well–but in order to keep things as tidy as possible, it’s a good idea to link down (or at least in one consistent direction, if your editor displays things differently). By always linking down, it’s much easier to navigate the conversation when editing or scripting.
6: Player Responses. Here we have our first set of Player responses, in reply to the “Now I really want to know…” line. For this sample, since we’re broadly aiming for a voiceover-and-cinematics style, we’re also using paraphrases (designated by the parenthetical comments).
7: More Forced Player Lines. Getting a real back-and-forth going requires a certain number of forced Player lines–imagine this sequence if we paused for a Player choice after every NPC line. Of course, it clearly takes a degree of control away.
8: Merging Branches. After the back-and-forth, we link branches again. This branch could have gone on longer, with its own sets of Player responses, but remember that every time you branch you’re writing for a smaller segment of your Player base. Make sure that if you’re going to maintain a long branch that it’s worth it–the time you (and everyone else involved in production) spend on an obscure branch is time that could be spent polishing and improving the conversation’s critical path.
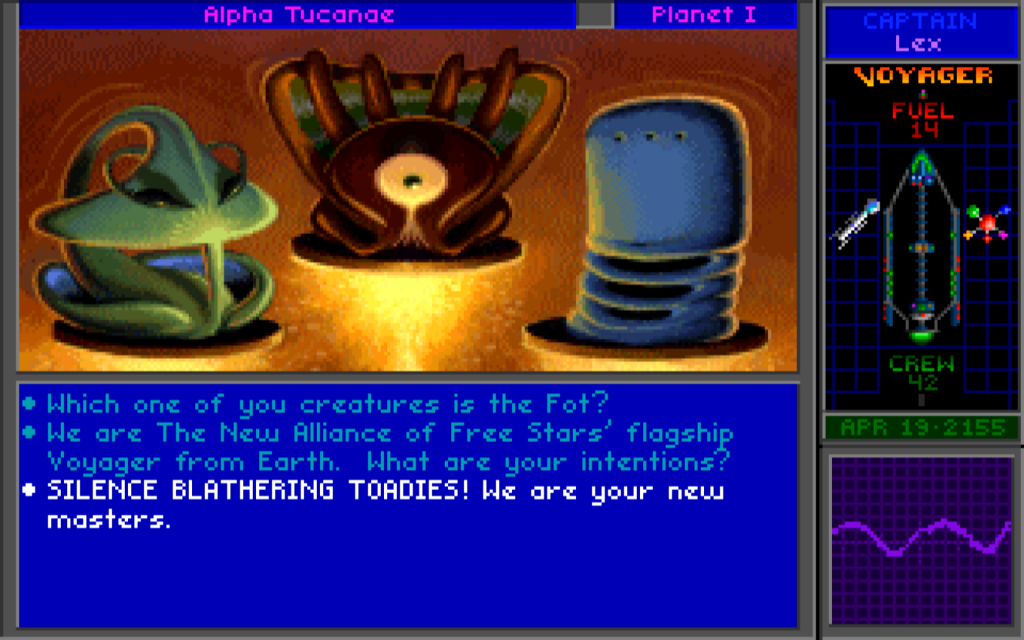
Certain conversation branches will clearly only lead to disaster, but it’s nice to know they’re available (from Star Control 2).
Of course, Players will swiftly notice and become disillusioned if every option leads to the same place. And there’s something to be said for supporting a Player’s belief that there’s rich and in-depth content she’ll never see–it supports the overall sense of a compelling, reactive game world.
Determining where to branch and where not to is one of the greatest challenges of interactive dialogue writing. We’ll talk about it more in future posts.
9: Second Set of Player Responses. This second set of Player responses doesn’t display the NPC replies (they’re compressed for readability–note the “+” and “-” signs next to every line that hide or reveal the lines below), but the conversation could go on indefinitely from here until the writer determines a conclusion.
10: Cinematic Sequence. The particulars here would obviously depend on your editor and game engine. I’ve noted it just for the sake of readability. (It can be very useful to have a way to add unseen-by-the-end-user comments into a conversation for fellow developers, reference, and so on.)
11: End Dialogue. With the NPC murdered, there’s no need for the conversation to continue. Presumably the hidden branches off the second set of Player responses include another way to end the conversation.
12: Hub-and-Spoke. This conversation follows a slightly different style than the first, using a hub-and-spoke structure. Note that each Player response (except the last, which presumably ends the conversation) leads back up to the same set of replies, removing only the response most recently used.
Note also that this conversation eschews paraphrases–hub-and-spoke structures tend to read more artificially than waterfall structures, so in this case, I’m envisioning the game not using voiceover (in which case paraphrases add less value).
Coming Up Next
And that’s it for the basics of building a conversation tree. Of course, building a conversation tree that’s engaging and dramatic is another issue altogether. Next time, we’ll talk about the guiding principles of branching conversation writing and answer questions such as “What makes a choice ‘matter’?”, “How do you put the Player character at the center of the scene?”, and “How do you handle Players who just want to skip the dialogue and go back to shooting things?”

